App autoscaling is not a trivial task as it might look. I was really excited when I read about Vapor. I would like to share my experience of playing with this great tool.
Project size
Our project is nearly 650Mb and Lambda has limitations of 250Mb unzipped.
We had a few binaries in our composer dependencies. I tried to remove them but it doesn’t help.
Also removed all dev dependencies. Make sure that you don’t use any PHPUnit functions in your code. For example: assert() etc.
Next, I found out that vapor supports Lambda layers via docker. It has a limit of up to 10Gb per layer.
That helped. All your need to do is only add this line:
runtime: docker
And create a docker file associated with it. You can use the command
vapor env my-environment — docker
Building assets
We use docker containers for the local development and a simple composer install command won’t work locally.
You have to run a command via docker-compose exec.
It’s not a big problem but still, you need to be ready to adjust deployment scripts.
Working directories
We are using a storage directory to save some files, configurations. The storage directory is not available via Lambda or I’m missing something.
Laravel passport
Lambda functions don’t work properly with storage as every request goes to the new container.
You can use EFS but we tried to avoid it as it has limitations and pricing can be high.
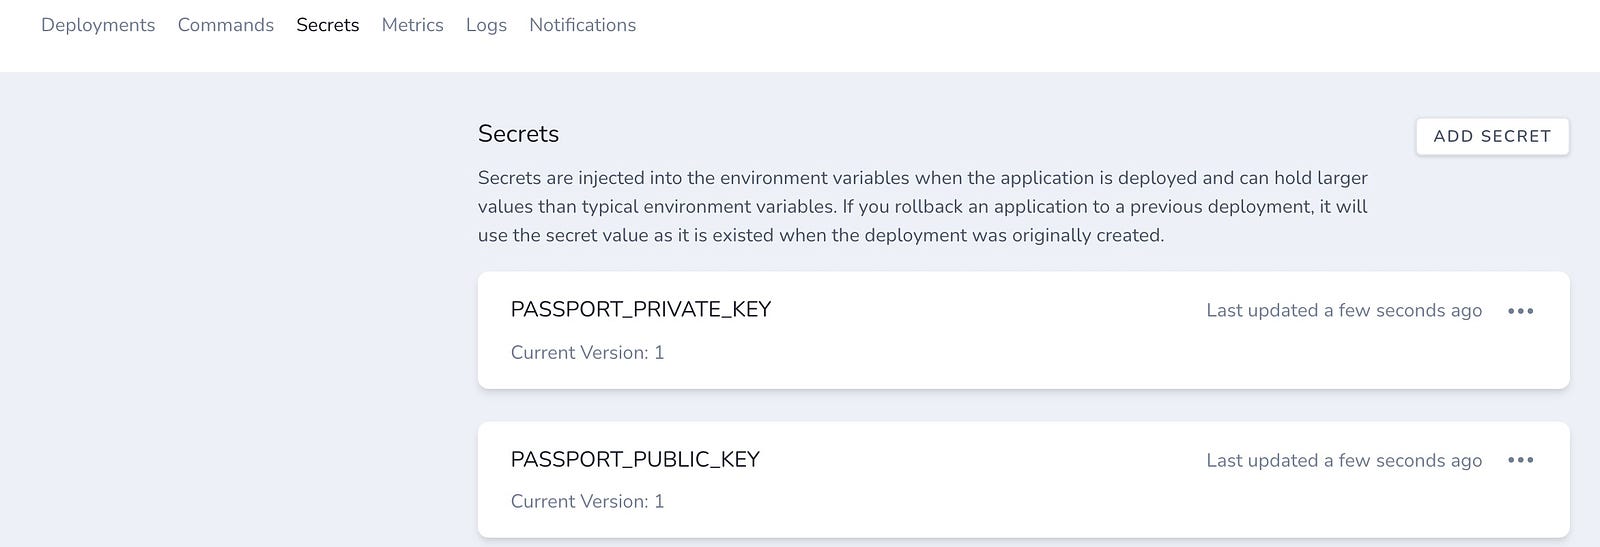
Passport requires certs but they can be stored in the env. So we put them under Secrets. Read more about it here https://laravel.com/docs/8.x/passport#loading-keys-from-the-environment

And don’t forget to remove this code if exists:
Passport::loadKeysFrom(storage_path(“some_path”));
File limits in a public folder
That is a weird thing. Vapor limits to 400 files in the public folder. I really don’t understand why do they limit it as many projects have more than 400 files there. Previously we were uploading assets to S3 via our scripts but that doesn’t make a lot of sense when using Vapor.
And don’t forget to use a built-in asset() helper for URLs.
Debugging
It’s really hard to debug a serverless app. I had a white screen after my first deployment and no logs at all. It was some problem with my Docker file but it was not obvious at all. You cannot ssh into the server and debug it as usual. Deploying takes a lot of time. So it’s a bit time-consuming to debug anything. If you change one line of code or add some file — you have to run vapor deploy each time. In my case, it takes a few minutes(sometimes up to 8 min) just to see any changes.
Queues
We used to run queues via Redis and horizon. Vapor does not support horizon from the box. It uses SQS for this purpose. So you need to check your config/queues.php configuration first.
Also, you don’t have to specify a queue for a job. In other cases, it won’t work. I spent a lot of time fixing it as we specified queue names in many places.
SQS doesn’t have separate queues so all jobs will be executed one by one. It’s not good for many cases. For example, we have lots of cron jobs and if someone will sign up at that moment — all jobs will be put on one queue. It will take some time for a user to receive a confirmation code which is not a good experience. I personally like Horizon more but vapor has a vendor look on SQS.
Env values and AWS keys
In my case, AWS_ACCESS_KEY_ID and AWS_SECRET_ACCESS_KEY were set as null in my config files but they actually exist in the env. How did I know that? Good question. I’ve created a small CLI command to be able to see env and config values. Vapor doesn’t show you that information from the box.
Here is my code:
<?php

namespace App\Console\Commands\Vapor;

use Illuminate\Console\Command;

class GetEnv extends Command
{
       /**
        * The name and signature of the console command.
        *
        * @var string
        */
       protected $signature = 'tc:vapor:get_env {--env=} {--config=}';

       /**
        * The console command description.
        *
        * @var string
        */
       protected $description = 'Get env value';

       /**
        * Create a new command instance.
        *
        * @return void
        */
       public function __construct()
       {
              parent::__construct();
       }

       /**
        * Execute the console command.
        *
        * @return mixed
        */
       public function handle()
       {
              $env = $this->option('env');

              if ($env) {
                     $this->info('ENV VALUE:');

                     if (env($env)) {
                            $this->info(env($env));
                     } else {
                            $this->warn('No value');
                     }

              }

              $cfg = $this->option('config');

              if ($cfg) {
                     $this->info('Config VALUE:');

                     if ($value = config($cfg)) {
                            if (!is_string($value)) {
                                   dump($value);
                            } else {
                                   $this->info($value);
                            }

                     } else {
                            $this->warn('No value');
                     }
              }

       }
}
I run that command via Vapor dashboard. In another case, I would have to deploy a dd() each time. It saved me hours of debugging.
I still cannot fix it. The only way is to hardcode keys as a default but it’s really very bad practice.
You can have multiple AWS accounts under one vapor account. It’s very useful when you have multiple apps for different clients or business/personal.
All you have to do is to add an account at Team settings/AWS accounts: https://vapor.laravel.com/app/team/settings/cloud-providers . Next, when you create a new project — select a proper AWS account.
Exif extension
We are using the Exif extension in our project. Imagick is installed from the box but exif not. To make it work you should add it to your Dockerfile:
FROM laravelphp/vapor:php74
RUN docker-php-ext-configure exif
RUN docker-php-ext-install exif
RUN docker-php-ext-enable exif
COPY . /var/task
Conclusion: We are not ready to move our production app to Vapor as it has some limitations and some unresolved issues. Vapor is a really nice tool and I’ve already deployed my personal blog with a help of this SAAS. It can be a great choice for new apps which are expecting heavy traffic.
My socials:
https://ivankolodiy.medium.com
https://www.facebook.com/kolodii.ivan


